Introduction
Last week we were introduced to Second Life. Throughout the blog entry I tried to capture some of the more basic steps one goes through when experiencing Second Life for the first time. Following last week’s introductory session this week we were introduced to Linden Scripting, the main driver behind Second Life. Second Life’s first name was Linden World and the name stuck with its scripting language as Linden Scripting. Technically speaking the scripting language currently available in Second Life is LSL2 and was developed by Linden Labs. Scripting in Second Life aims to achieve the following goals:
So to recapitulate scripting in Second Life allows for the adding of behaviour to otherwise inanimate objects throughout the world. The scripting engine of Second Life makes sure that the script being compiled is permissible in the virtual world.
Task Summary
This is a brief summary of the content within this blog entry;
When creating or building complex objects the building blocks in any complex object in Second Life are prims. I found the need to give a brief description on prims since any linden script has to be attached to one or more prims.
Introducing Prims
As already mentioned prims are the basic blocks for creating more complex objects in Second Life. A prim is a 3 dimensional geometric object and is irreducible which means it cannot be split into smaller components. In Second Life, a prim is one of several 3D shapes;
Last week we were introduced to Second Life. Throughout the blog entry I tried to capture some of the more basic steps one goes through when experiencing Second Life for the first time. Following last week’s introductory session this week we were introduced to Linden Scripting, the main driver behind Second Life. Second Life’s first name was Linden World and the name stuck with its scripting language as Linden Scripting. Technically speaking the scripting language currently available in Second Life is LSL2 and was developed by Linden Labs. Scripting in Second Life aims to achieve the following goals:
- Provide a robust method to allow user to add behaviour to objects.
- Simple interface to exchange scripts and to modify object properties.
- Provide a language for advanced users.
- Ensure that the script does not crash the Second Life simulator.
So to recapitulate scripting in Second Life allows for the adding of behaviour to otherwise inanimate objects throughout the world. The scripting engine of Second Life makes sure that the script being compiled is permissible in the virtual world.
Task Summary
This is a brief summary of the content within this blog entry;
- Introducing Prims
- Creating and Managing Primitives (Prims)
- Introduction to Linden Scripting
- Creating basic Linden scripts
When creating or building complex objects the building blocks in any complex object in Second Life are prims. I found the need to give a brief description on prims since any linden script has to be attached to one or more prims.
Introducing Prims
As already mentioned prims are the basic blocks for creating more complex objects in Second Life. A prim is a 3 dimensional geometric object and is irreducible which means it cannot be split into smaller components. In Second Life, a prim is one of several 3D shapes;

The wide range of prims permissible in SL
| Prims | Image |
| Cube |  |
| Prism |  |
| Pyramid |  |
| Tetrahedron |  |
| Cyclinder |  |
| HemiCyclinder |  |
| Cone |  |
| Hemicone |  |
| Sphere |  |
| Hemisphere |  |
| Torus |  |
| Tube |  |
| Ring |  |
| Tree |  |
| Grass |  |
The last two prims Tree and Grass and not basic shapes but they are built into Second Life and therefore are treated like ordinary prims. When prims are linked together they are called an object and can contain anywhere from 1 to 255 prims. Unlike most 3D software SL uses parametric models. Parametric modelling reduces the amount of information that is to be transferred between your computer and SL servers which results in a much smoother workflow.Parametric modelling describes objects using a few simple parameters rather than describing each and every particle of an object like most 3D modelling software do.
To create a prim or any prim combination is known to “rez” it. In the next section of this blog entry we will go through creating and managing prims.
Creating and Managing Prims
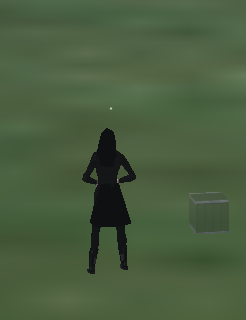
If you are used to using 3D software then you might need some time to adjust to creating and managing 3D objects in Second Life. For this demonstration first I will be creating a cube prim and go though some of properties by editing the prim. All of these demonstrations took place at Fermi Sandbox, Fermi (19, 150, 23).
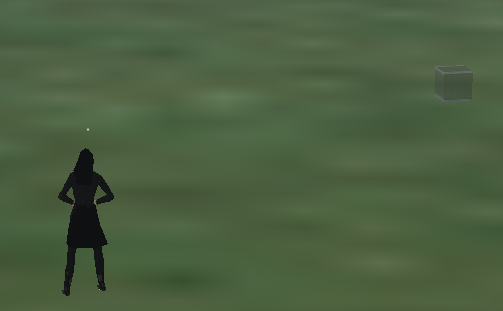
To create a prim I selected the Build - Select Build Tool and Create Tool or Ctrl + 4 as a shortcut. Once selected I selected the Cube prim from the Build Panel and clicked on the floor.
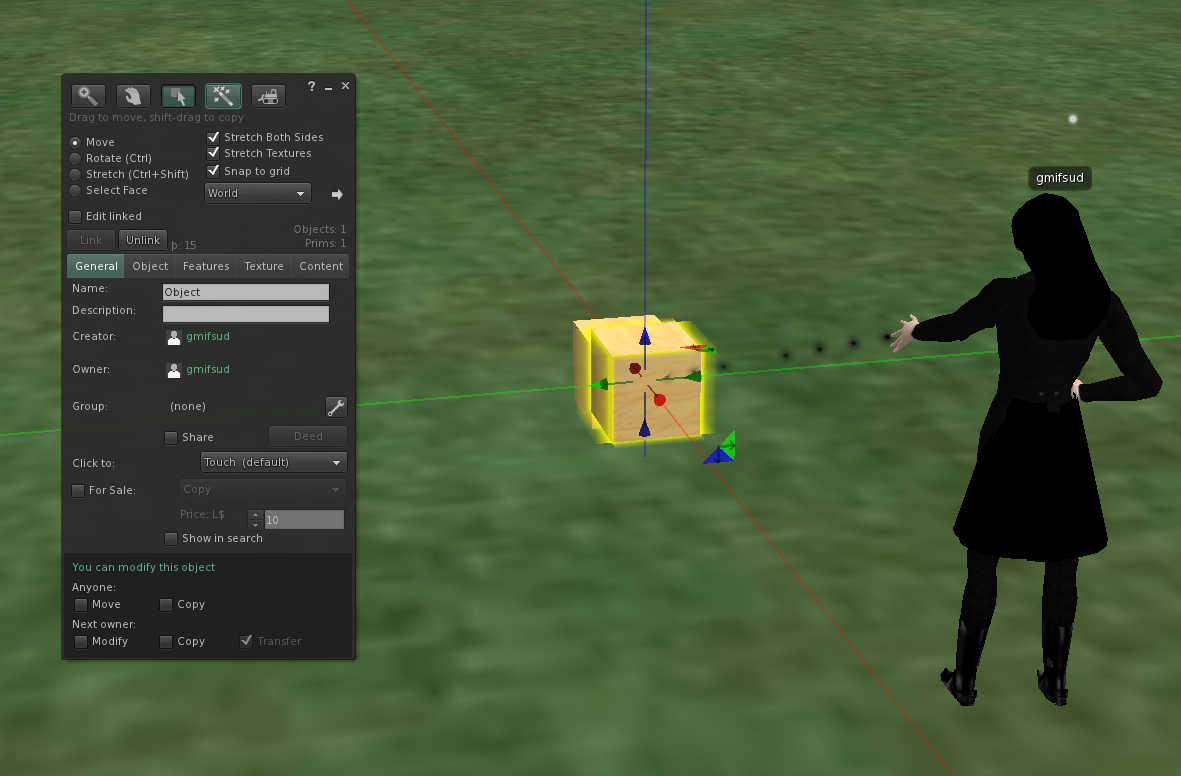
Creating a cube prim
Right after creating the prim Second Life automatically switches to edit mode. If the prim is deselected edit mode is terminated. To re-enter edit mode all I had to do was to click on the object. By clicking on the object the build panel is reopened.
The most basic and flexible way to manipulate prims is through the prim handles. These handles are denoted by red, green and blue cones and triangles attached to it. These handles are are color-coded as to reflect the following axes and directions.
- X: east / west (red)
- Y: north / south (green)
- Z: up/down (blue)

Moving prim upward using blue handle
In normal Edit mode you the move handles are visible. The three intersecting lines allows for the object to be moved along a given axis. This axis can be relative to the rest of the world or to the object itself. The triangular planes allowed me to move the object with a combination of two axes.
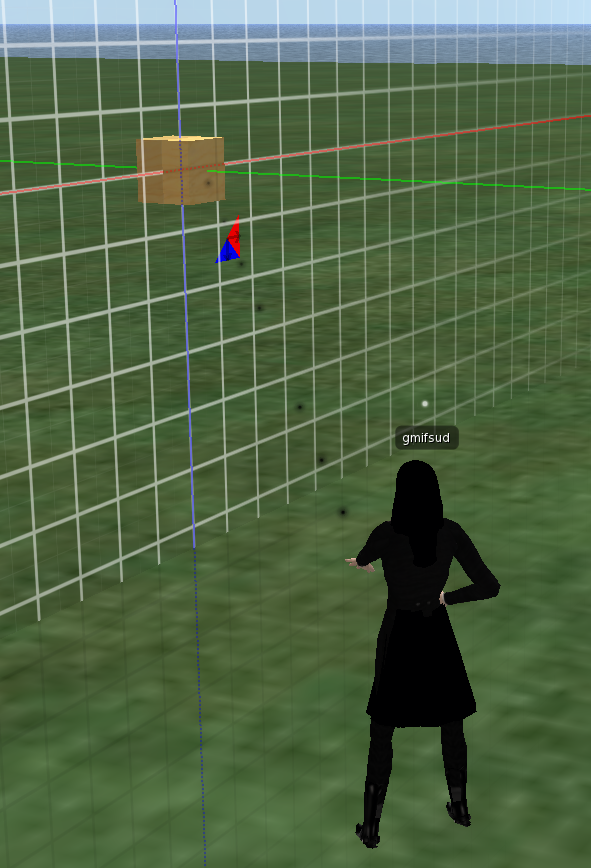
Moving Prim along 2 Axes using triangular plane handles
To rotate the created prim I found that by pressing the Control key the object enters Rotate mode which replaces the object move handles with a sphere inside three circles. Each circle represents the orientation in which the object can be rotated.

Rotating Prim using Rotate Mode
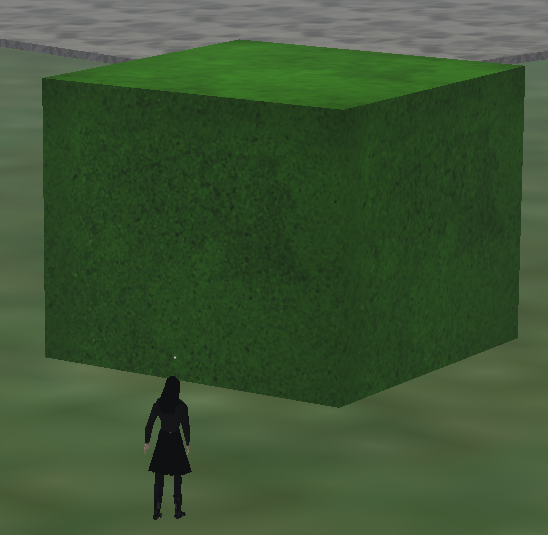
To change the dimension of the created prim holding down the Control and Shift key put the prim into Stretch mode for the avatar. This places a white object handle on the eight corners of the object as well as a colored handle on each edge of the prim. By clicking and dragging these stretch handles the object changes its dimensions according to the direction of the stretch along the axis. In the Build panel a Stretch both sides check box is available which allows for the object to be stretched on both sides.

Stretching object from both sides using stretch handle
At this point we have a good “handle“ on how to create and edit a prim. There are a lot of options in the build panel which help in shaping an object to one’s preference.

Build Panel - General Tab
The Build Panel has five tabs each of which are specific to a group of properties pertaining to the object being in edit mode. The General tab allowed me to give associate information to the object. The Group option within this tab doesn’t have to do with linked objects but rather with the resident group to which an object is set.

Build Panel - Object Tab
The left side of the Object tab is always the same while the right half of the tab changes depending on the type of prim being edited. This is due to different primitives use different parameters. The properties in this tab allow the object state to be locked, physical temporary or phantom.
Locked: A locked object locks the position and dimensions of the object.
Physical: Interact with Second Life through the physical constraints of the world.
Temporary: makes the object volatile in the sense it disappears after about 60 second
Phantom: allows avatars to penetrate the object such as for example when designing a curtain.
Other properties which can be modified are position, size rotation and the type of material such as stone, metal, glass, wood and plastic each with its own collision properties.
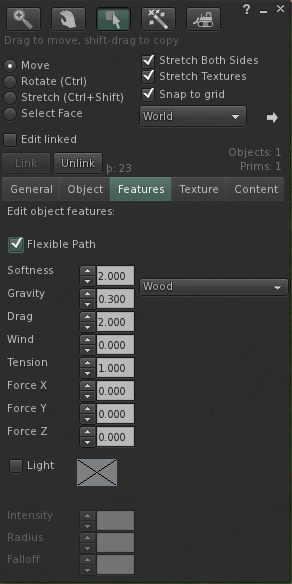
Features tab in Build Panel
The features tab allowed me to create flexible paths on the prim. Prims with a flexible path are known as flexiprims and are purely client-side effect. This means that they don’t appear to be flexible from the server’s perspective, because they don’t interact with anything on the server.

Changing prim flexibility through the features option
The features tab also exposes a set of properties on lighting. Second Life supports lighting through OpenGL lighting. This means that I could set any object as a light source.

Texture tab in Build Panel
The texture tab allows the user to set color, texture and shininess of an object. By clicking the texture box a texture Picker window is displayed, The texture picker works much like an inventory with the distinct difference that a filter is applied to allow to see all the textures in the inventory no matter where they are. Clicking on the Color opens a color picker which allows to select the color preferred on all or one face of an object.
The last tab Content, is a place holder for scripts working on the object. We will go into the details of scripting in the following sections.
Introduction to Linden Scripting
At this point I have created a prim cool, but at this stage all I have is an inanimate object lying somewhere in this vast virtual space. Wouldn’t it be much cooler if these objects did something like respond to certain events within their environment ? Well that is were Linden Scripting comes in. When placed in a prim a script can control that prim’s behaviour, appearance and relationship with other prims it is linked with, allowing it to move, change shape, color or texture.
Creating the most basic of scripts is fairly easy. By going to the content tab of the build window and click on New Script a file New Script is created. This file contains the following code;
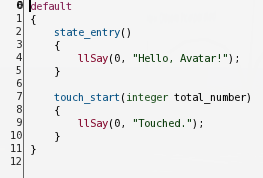
My First Script
The script shown above prints “Hello Avatar !” to the chat window when loaded and then shows “Touched” each time the object is click on. This simple script shows some of the elements of the overall script structure of linden scripting. Linden scripting syntactically resembles C or Java programming and is event-driven, meaning that the flow within the program is derived by events such as receiving messages, collisions with other objects or user actions. LSL has an explicit state model ad it models scripts as finite state machines meaning that different classifications of behaviours can be captured in different states. Between each state there are explicit transitions. Most data types used in LSL are similar to those found in other programming languages. There are a couple of distinct data types which are used in LSL which are the vectors and quaternions as well as a wide range of in-built functions which can be used within SL.
A typical script contains the following programming structures;
Constants
Constants are values which can never change during the execution of a script. There are constants which are available in all scripts such as PI and STATUS_PHYSICS. (States whether an object is subject to the SL laws of physics).
Variables
Variables provide the required temporary storage for working values when executing the script.Example current position of an object.
Functions
Mechanisms to break code in smaller more manageable chunks that do specific sub-tasks.
Types
A type describes a piece of data being represented within a script. This is a list of the data types available in Linden Scripting
| Data Type |
| Integer |
| Float |
| Vector |
| rotation/ quaternion |
| key |
| string |
| list |
States
Second Life models scripts as event-driven finite state machines. An event-driven finite state machine can be viewed as a model of behaviour composed from a number of states, transitions between those states and actions. LSL scripts must implement at least the default state.
Creating basic Linden Scripts
Throughout this section we will go through some basic scripts. The script shown above uses the LS in-built function llSay to display a message on the chat log. Displaying messages can be achieved using a variety of in-built functions. This is a table of said functions;
- llSay(Channel,Text) - Any text passed as an arguments is emitted throughout the world at a range of 20 meters
- llWhisper(Channel,Text) - Any text passed is emitted for a given range of 10 meters
- llShout(Channel,Text) - Any text passed is emitted for a given range of 100 meters
- llInstantMessage(Key,Text) - Any text passed is send to the avatar being referenced in the Key parameter
- llOwnerSay(Channel,Text) - Text is only visible to the owner of the prim emitting the message
Chatter Cube
So to get better acquainted with the chat functions available I created a cube named it Chatter Cube and created a new script in the content pane.
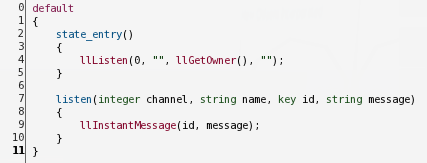
The preceding script is a simple repeater that illustrates the basics of scripted chat. All it does is repeat everything I say. When the script starts, llListen sets up the listen event so that the object can listen for chat and llListen can filter what is the object listens by using chat channels, names, UUID and message. In this case the script listens on channel 0, which is the public chat channel that all avatars are on. Once the listen event handler is triggered an llinstantMessage is fired which directs the passed text to the avatar having that particular id which in this case is the id obtained from the llGetOwner function.
Chatting with Chatter Cube
Sitting
Sitting is one of several ways an avatar can interact with objects in SL. So for this demonstration we will be first creating a chair and sit on the chair without using any scripts.
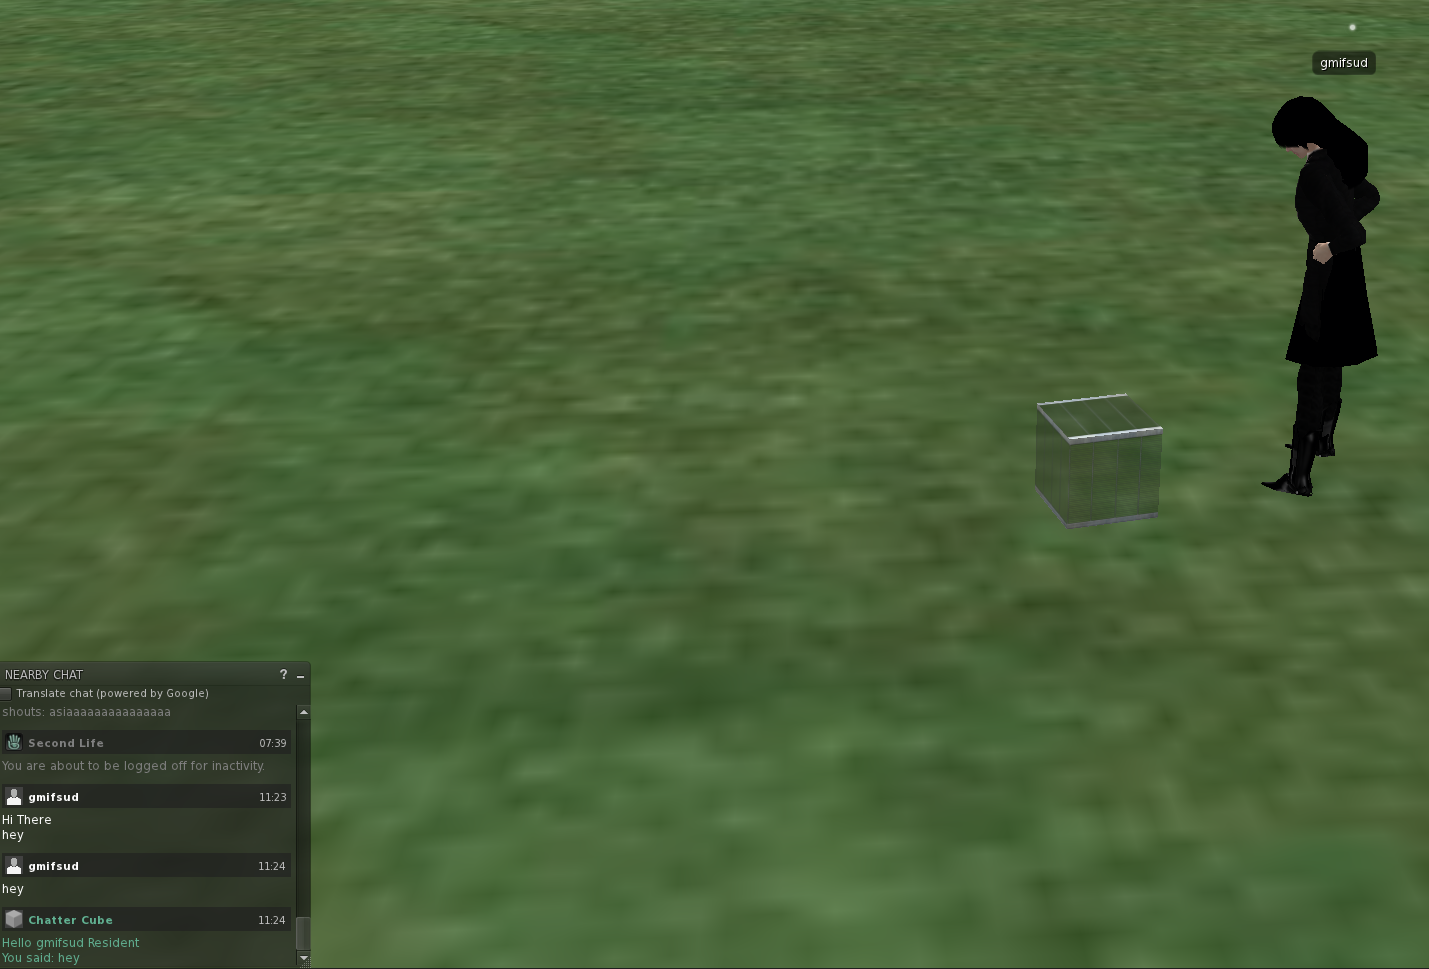
To build the chair first I created the base which is the part were the avatar will sit by using the hemicyclinder.
Chair Base
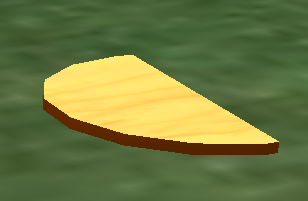
Afterwards I created four legs composed cylinders. Two of the legs were rotated slightly forward which were placed at closer to the rounded edge of the base and the other two legs were rotated backwards and placed behind the first two legs. This configuration provided some stability to the chair when the chair is made physical.
Base attached to legs
All that remains is the back support. I created this part of the chair using a cylinder and applied the following values to the object properties;
| Property | Values |
| Path Cut | Start = 0.25, End = 0.75 |
| Hollow | 95 |
| Taper | X = -1, Y = 0 |
| Slice | B = 0, E = 1 |
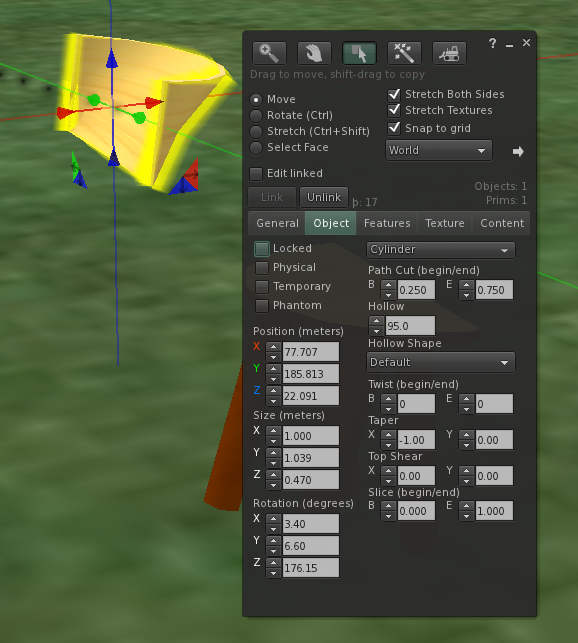
Creating Back support for chair
Once all components for the chair were created I linked and named the object and took a copy into my inventory. Once saved I right clicked and sat on the chair as depicted in the image below.
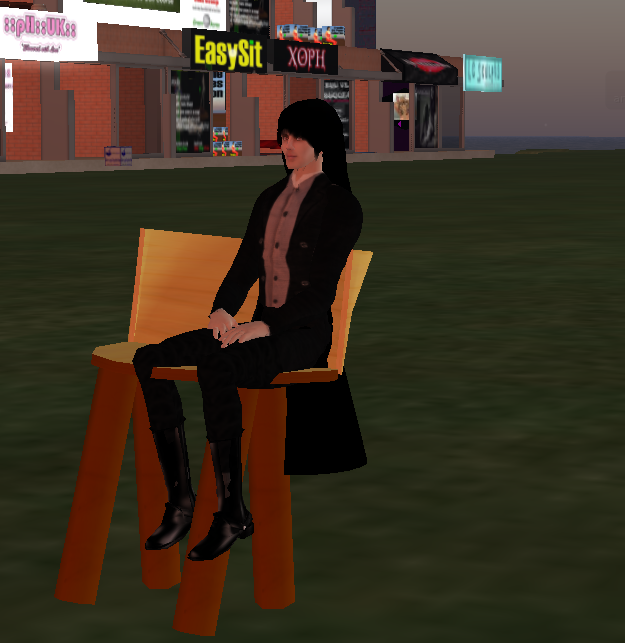
Sitting on chair
Now if you look closely one could easily notice that the position which the avatar takes when sitting on an unscripted chair is slightly favoured to the left side of the chair. To cater for this problem I had to script the chair so as to force the avatar at the center of the chair.
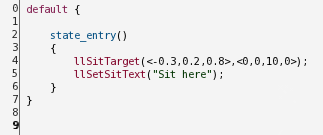
Script to center avatar when sitting
After applying the script I stood the avatar up and sat the avatar back on the chair and the posture taken by the avatar on the chair is centered.

Centering posture after scripting chair
This was achieved by using the llSitTarget function. This function takes two parameters which are the rotation and location. The rotation argument takes four decimal values which the location argument is a vector which takes three decimal values. The llSitSetText function sets the text on the menu option which triggers the sitting mechanism.
Movement
Moving in Second Life is the act of moving from one location to another over a period of time. The script shown in this demonstration only works if the object is non-physical. To move a physical object forces have to be applied to an object and we will go into that in the next blog post. In the previous script the avatar had to move in order to sit appropriately on the chair. In this demonstration we will be changing an object’s position over time. A script may change the position of its object by using the llSetPos function.
To demonstrate movement using LS i created a copy of my chatter cube and inserted this script;
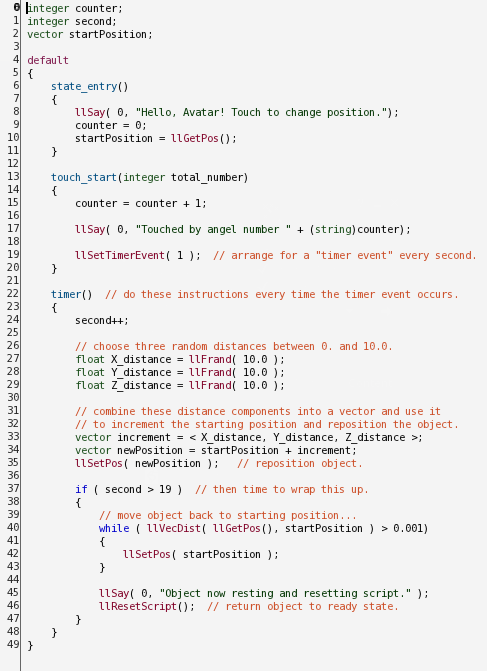
Script to move an object using a timer
This script is composed from two states which are entry and touch. When entered this script a counter variable is set to 0 and the current position of the object is inserted in a variable. The touch_start state increments the counter variable by one and sets a timer event to one which means that every second the timer will trigger a function called timer(). The movement of this script is done in the timer event. Every time the timer is called a random value is assigned to x,y, in variables X_distance, Y_distance and Z_distance respetivley. Each of the aforementioned positions are inserted into a vector variable called increment. The increment variable is added to the current position obtained on state_entry and assigned to the current position of the object using llSetPos.
A check is set in the timer function so as to quit the function if more than 19 second has passed from the time the object was touched. A while loop is then set to put the object back to its original location. An llResetScript is then called which terminates the timer.
To demonstrate the script explained above when the object is touched the following images are two shots taken from the movement script;
First Position taken by object
Second position taken by object
Appearance
Appearance within Second Life can be changed using the texture tab within the build panel or use Linden Scripting. I personally prefer scripting as it much more interesting and challenging. To demonstrate appearance using LS I will be creating an object which changes color over time.

Script that changes color over time using a timer
The script above uses a timer like the script used to demonstrate movement. The whole script takes approximately 19 seconds to run. The in-built function which changes color in an object is llSetColor. This function takes a vector argument representing R - Red, G - Green and B - Blue and a constant which signifies which side of the object will change color. In this case all sides of the object will change color by using ALL_SIDES. Aside from the color aspect of the object the scale of the object is also changed by using the in-built function llScale. This function takes a vector argument were in each float represent the X,Y,Z axes of the object. In this demo a random value is assigned using llFrand(10).
Object changing color and scale
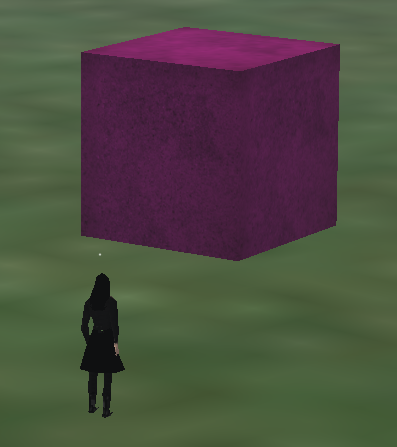 |
| Object changing color and scale |
Conclusion
At this stage we have scratched the surface of linden scripting. In the previous post I commented on the overall experience with Second Life as being a bit laggy and buggy sometimes. With scripting I had a totally different experience, it’s powerful and LS allows you to create all sorts of objects and structures even though I feel I have a lot yet to learn. Scripting the first couple of scripts were a bit tedious up until I got a feel for some of the in-built functions such as movement and appearance functions which allowed me to create some cool objects. My overall opinion on linden scripting is that it’s different at first specially since I was more used to scripting max script for 3DS Max and Actionscript for Flash but quite impressive once you get used to it.
Hello, I read your blog, saw your designs and found that its very informative.Also I would like to refer to your companys case study for learning purposes.
ReplyDeleteProfessional Web Design