Introduction
When we started discussing server side technologies we talked about the different types of servers and technologies involved in a typical web application. We discussed web servers, server-side languages and we also briefly mentioned database servers. In a client-server model the database server takes requests from the client who accesses the database through its command line interface or by connecting to a database socket.
When we started discussing server side technologies we talked about the different types of servers and technologies involved in a typical web application. We discussed web servers, server-side languages and we also briefly mentioned database servers. In a client-server model the database server takes requests from the client who accesses the database through its command line interface or by connecting to a database socket.
In the most part database servers in a dynamic web application help manage information which is either create by the user or generated by the application. Tasks performed by a database server include;
- Processing data modifications and retrieval requests
- Performing data-intensive processing
- Enforce database rules and constraints
- Enforce database security
Most of the tasks performed by a relational database server are done by a DBMS (Database Management System). The DBMS manages the creation, maintenance and use of a databases. A database designer can communicate with a database server either by connecting to the database from a command line terminal or by using a database management tool that come with the database package. Both of these methods require the designer to have a good knowledge of SQL. SQL comes in many flavours depending on the implementation of the database engine. There are two classes of SQL command which are DDL (Data Definition language) and DML (Data Manipulation Language).
Task Summary
Throughout this blog we will be using MySQL as a database to store information related to our tasks. MySQL was installed with the installation of XAMP. The tasks that will be demonstrated throughout this blog are;
- Log into the database server using the command line and perform some commands such as listing of databases
- Attempt to connect to SQL using PHPMYADMIN
- Create a database that stores user names and passwords
- Modify program created in the previous blog post as to connect to the database to authenticate the user.
Log into the database server using CLI and perform some commands
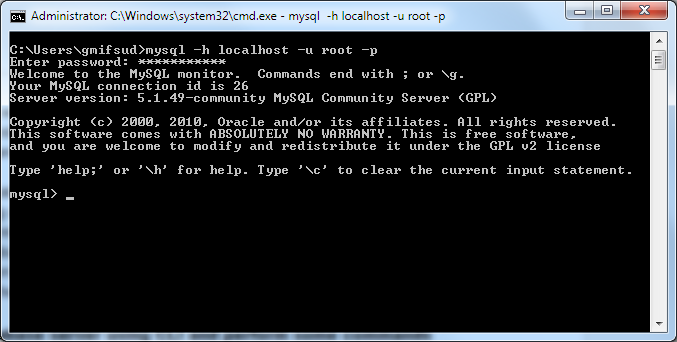
Throughout this section we will be using commands used to manage a database from the command line interface. First we need to log in to the MySQL command line terminal. To do this the following command is issued from the command prompt;

Once the command is entered a password has to be entered. The executable which is called when this command is dispatched resides in the XAMP/bin folder.
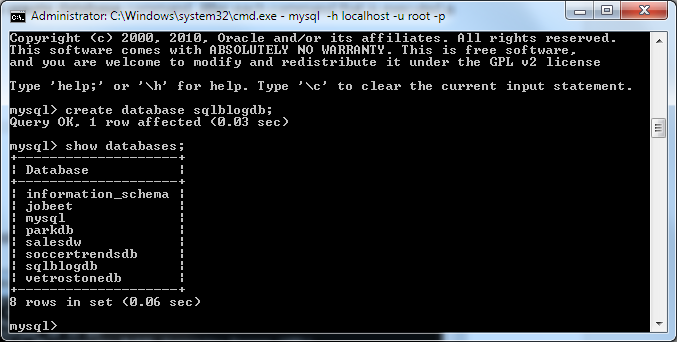
Since we need a database to do the tasks required I decided to create a database which will host the neccessary tables later. The name given to the database is sqlblogdb. This can be achieved by using the create database command. After each command that is executed a result message is displayed which states the time and status of the command execution.
CREATE DATABASE sqlblogdb;

To confirm that the database is created the show databases command can be used to list the databases available under this mysql instance.
SHOW DATABASES;
The database is listed and to use the database the use database command can be used.
This command can be used to use a special database called mysql.
USE mysql;
This database contains data pertaining to the mysql database server instance such as users.
To list the users currently available in mysql the following command can be dispatched;
SELECT user FROM mysql.user;

To create a new user the create user command is used followed by identified by followed by the password.
CREATE user ‘gmifsud’@’localhost’ IDENTIFIED BY ‘gregory1983’;

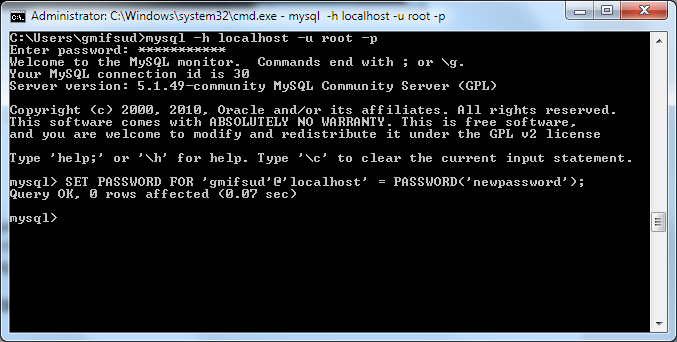
Since this user was just created the rights allocated are the bare minimum which means that if the user tries to log in the mysql system database will not be available. To change the password for a user the following command is used;
SET PASSWORD FOR ‘user’@’hostname’ = PASSWORD(‘newpassword’);
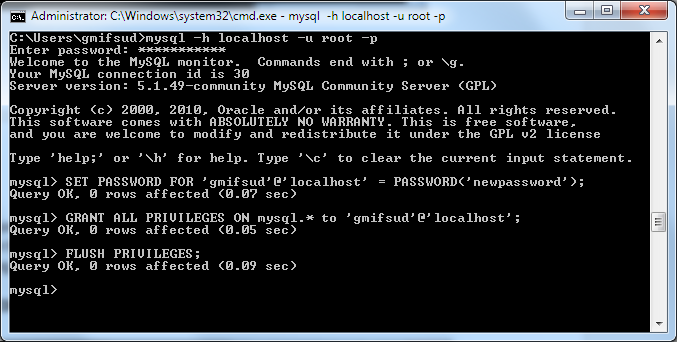
Changing the privileges of a user requires the use of the GRANT command. This command requires the database and host name as parameters along with any specific tables being effected by the privilege. This command is usually followed by a FLUSH command to reset the change into affect.
GRANT ALL PRIVILEGES ON mysql.* to ‘gmifsud’@’localhost’;
FLUSH PRIVILEGES;
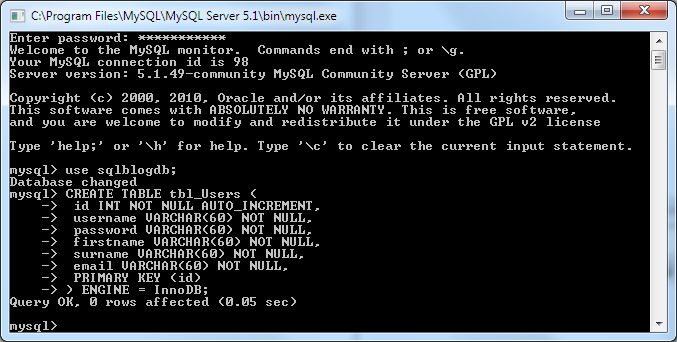
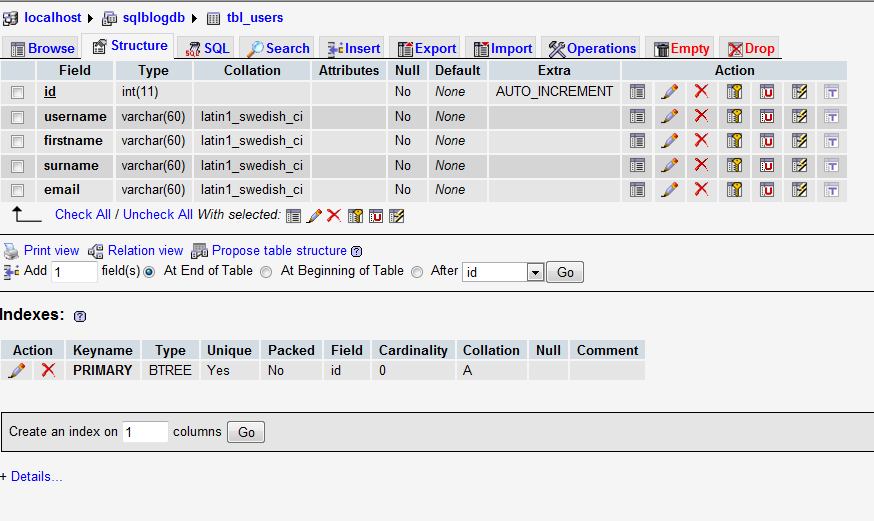
Having a better understanding of the system database now we can proceed in managing the newly created database sqlblogdb. Since the database has just been created no tables are available. We can confirm this by using the SHOW TABLES command once using the database. To create a table the DDL syntax CREATE TABLE is used. For this demonstration we will be creating a users table named tbl_Users which will contain three fields the id, username and password.
CREATE TABLE tbl_Users (
id INT NOT NULL AUTO_INCREMENT,
username VARCHAR(60) NOT NULL,
password VARCHAR(60) NOT NULL,
firstname VARCHAR(60) NOT NULL,
surname VARCHAR(60) NOT NULL,
email VARCHAR(60) NOT NULL,
PRIMARY KEY (id)
) ENGINE = InnoDB;
Attempt to connect to phpMyAdmin
phpMyAdmin is a web based open source tool who objective to aid database administrators in managing mysql. Amongst other features phpMyAdmin helps in manging databases by creating, deleting and modifing databases as well as administer users and privileges. phpMyAdmin is accessed by navigating to the <domainname>/phpmyadmin which in our current scenario is http://localhost/phpmyadmin/. In our current implementation of XAMP phpMyAdmin can be accessed from the XAMP dashboard on the left navigation bar. On entering the web application a user name and password is requested. The credentials inputted are the same used in accessing mysql from the command line interface.

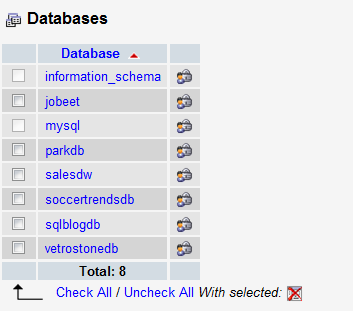
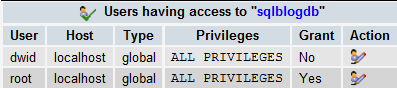
From the home page on the left hand side of the screen the databases are listed. For this demonstration we will navigate through some of the options available. Databases can be managed by selecting the Databases tab. With each database listed an icon is available that links to the privileges for that database.
The privileges screen shows a list of users each with an icon which links to the privileges for that user. When editing privileges for a user the screen is divided into four sections;
- Global privileges
- Database-specific privileges
- Change password
- Change login information / Copy User
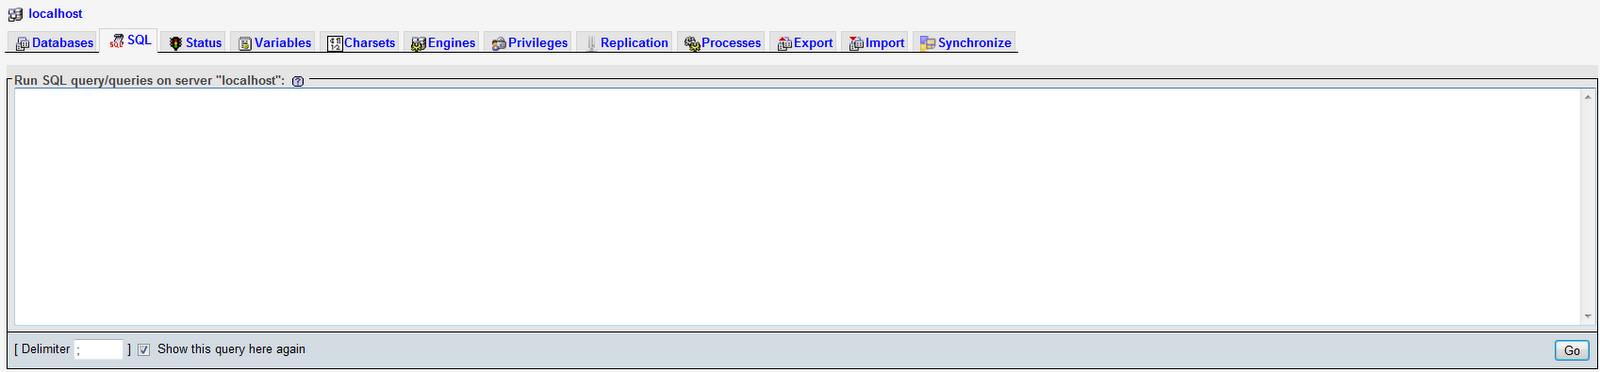
In the SQL tab a database administrator can enter SQL syntax to manage databases.
Each database structure can be managed by clicking on the database. Columns can be created, modified or deleted.
Create a database to hold user names and password
In the first task of this blog we already created the database and table (tbl_Users) which will be storing the user names and password.
To create the database the following sql was entered in the command line interface.
CREATE TABLE tbl_Users (
id INT NOT NULL AUTO_INCREMENT,
username VARCHAR(60) NOT NULL,
password VARCHAR(60) NOT NULL,
firstname VARCHAR(60) NOT NULL,
surname VARCHAR(60) NOT NULL,
email VARCHAR(60) NOT NULL,
PRIMARY KEY (id)
) ENGINE = InnoDB;
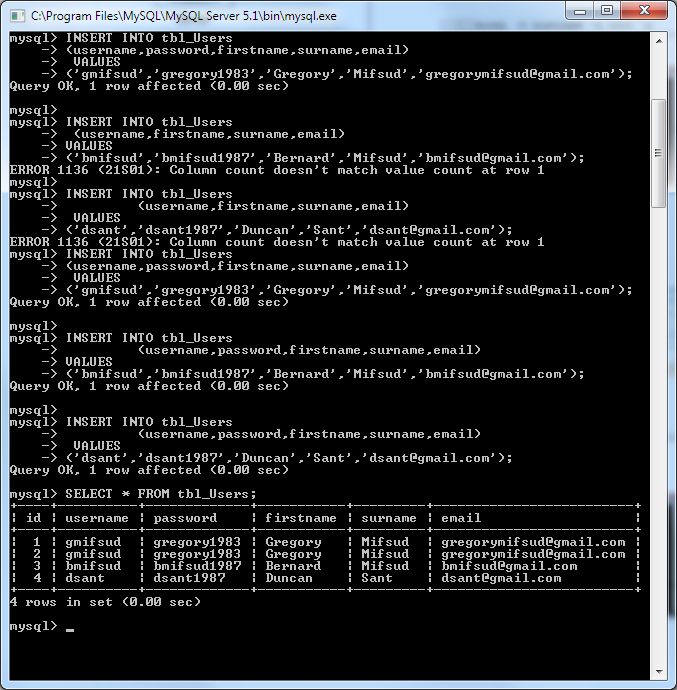
Once the table is created and confirmed by calling show tables some data is populated in the table by calling the sql queries shown below;
INSERT INTO tbl_Users
(username,password,firstname,surname,email) VALUES
(‘gmifsud’,’gregory1983’,’Gregory’,’Mifsud’,’gregorymifsud@gmail.com’);
INSERT INTO tbl_Users
(username,password,firstname,surname,email)
INSERT INTO tbl_Users
(username,password,firstname,surname,email)
VALUES
INSERT INTO tbl_Users
(username,password,firstname,surname,email)
VALUES
(‘bmifsud’,’bmifsud1987’,’Bernard’,’Mifsud’,’bmifsud@gmail.com’);
INSERT INTO tbl_Users
(username,password,firstname,surname,email)
VALUES
(‘dsant’,’dsant1987’,’Duncan’,’Sant’,’dsant@gmail.com’);
To confirm that the data has been populated successfully a query was executed.
SELECT * FROM tbl_Users;
To confirm that the data has been populated successfully a query was executed.
SELECT * FROM tbl_Users;
Login Screen using database
At this point we have the table (tbl_Users) which contains the users that will be validated through the login screen and the login screen described in the previous two blog posts. Our current system validates the user details entered by matching with data retrieved from a text file. In this task we have to replace the function which validates the user with a function that connects to the database and checks that the entered user and password match one of the records available in the table.
The function validating the user with the tbl_Users first connects to the database by using the mysql_connect function. This function takes a hostname, username and password as arguments. Once connected to the database the database is selected which in this case is tbl_Users by using the mysql_select_db. This function takes a database and the previously instantiated connection. Since we are connected to the database a query is dispatched to the table were all the users are selected using the mysql_query function.

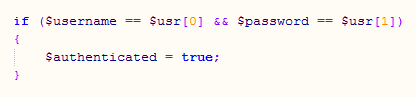
The result from this function is an associative array were the key is the column name set for the tables. The array is iterated and each of the two fields is then matched against the inputted username and password.

Conclusion