Introduction
Mobiles have become ubiquitous in today’s modern life style. Mobiles started out as a portable telephone used to make mobile telephone calls across a geographic area . Technological advances in both mobile technology and mobile web standards brought the Internet in the palm of our hands. There are limitations when one compares Internet browsing from a PC or a laptop to a mobile such as navigation and speed.
With the introduction to HTML5 mobile web development is taking a different shape. A survey conducted by Web Directions found that 2010 saw an explosion of interest and activity by developers in HTML5, and developing native apps for mobile platforms like iOS and Android using web technologies.
This blog entry will focus on developing a mobile web application using geolocation. Geolocation is the technical term used in figuring out where you are on the map and maybe share you location if need be. Finding your location can be achieved in numerous ways such as;
Privacy is a concern when talking about geolocation in fact the geolocation API which we will be discussing states that location information shouldn’t be sent to web sites without the confirmation of the user.
The geolocation API is an interface by which latitude and longitude information are available through Javascript. This information can be sent to a remote server or used to pin point your location on a map. This API is supported in most modern browsers on both desktop and mobile devices.
Task Summary
The tasks that will be demonstrated in this blog are;
W3C Geolocation API
The geolocation API offered by the W3C centers around a property of the DOM navigator object;
navigator.geolocation
The simplest use of the geolocation API looks like this;

In the script shown above there is no error handling and no options. The web application should probably include at least the first two of those. When running this code for the first time the browser asks you one whether you want to reveal you location. This means that the browser will never force you to reveal you current physical location. User experience differs from browser to browser.
To recap when the getCurrentPosition(callbackfunc) is called the following takes place;
The getCurrentPosition function takes a call back function which in the example shown above is show_map. The call will return immediately but doesn’t mean that you have access to the location. The location information will be available in the call back function.

The callback function will be called with a single parameter, an object with two properties coords and timestamp. The timestamp is just that, the date and time when the location was calculated. The coords object has properties like latitude and longitude that represent exactly what they sound like which is the user’s physical location. The position object’s properties are ;
With the exception of latitude, longitude, altitude and accuracy the result from the properties might be null.
In the function shown above the positionError object will contain a number if an error has occured. The number represents an error type a shown in the image above.
To demonstrate the geolocation API I created an HTML document which at this point will host three functions;

The function above first checks that the geolocation object in the DOM navigator is defined. Then if the getCurrentPosition() function yielded any results the display_loc(position) function is called.

This function takes the position object and displays the results in table cells by accessing the innerHTML property. The last function created handles any errors which could result from the getCurrentPosition() function. The code used has already been shown in a previous snippet.
The following result is achieved;

An interval was created so as to refresh the location information every 60 seconds. A Stop Tracking button was also added so as to stop the timer from re-executing the script.
Google Maps
I found this part of the demonstration quite interesting. At this point in our script we have all the information we need to pin point our location on a map (latitude and longitude). These two values can be passed as parameters into google static maps to show our locations. All the information I required was available at Google Static Maps API
To add the google maps feature all I had to do was to add an anchor tag which when the page loads is empty. When the geolocation function is triggered the anchor ‘s href attribute is filled with the following URL containing my latitude and longitude positions.

The display_maplink(latitude,longitude) function is called from the callback function of the getCurrentPosition() function. If an error has occured while getting the positioning information the anchor tag is set to hidden from the page.


Conclusion
At this point we have covered the W3C geolocation API but that is not all there is on geolocation. It is well known that there is an Open source browser plug-in from Google called Gears that provides geolocation information. The advantage of this API is that it is supported by older browsers as well as new.
This has been an informative experience from which I have learned a lot on geolocation. The drawback of such an API as I see it is different browsers. Different browsers give different experiences to the user which one might not anticipate when designing geolocation web applications for mobiles. With the slow introduction to HTML5 one can only hope that one day web technologies and markup will be standardised and make our lives a little easier.
Mobiles have become ubiquitous in today’s modern life style. Mobiles started out as a portable telephone used to make mobile telephone calls across a geographic area . Technological advances in both mobile technology and mobile web standards brought the Internet in the palm of our hands. There are limitations when one compares Internet browsing from a PC or a laptop to a mobile such as navigation and speed.
With the introduction to HTML5 mobile web development is taking a different shape. A survey conducted by Web Directions found that 2010 saw an explosion of interest and activity by developers in HTML5, and developing native apps for mobile platforms like iOS and Android using web technologies.
This blog entry will focus on developing a mobile web application using geolocation. Geolocation is the technical term used in figuring out where you are on the map and maybe share you location if need be. Finding your location can be achieved in numerous ways such as;
- IP address
- Wireless network connection
- Cell tower connected to the phone
- GPS hardware receiving latitude and longitude information from satellites
Privacy is a concern when talking about geolocation in fact the geolocation API which we will be discussing states that location information shouldn’t be sent to web sites without the confirmation of the user.
The geolocation API is an interface by which latitude and longitude information are available through Javascript. This information can be sent to a remote server or used to pin point your location on a map. This API is supported in most modern browsers on both desktop and mobile devices.
Task Summary
The tasks that will be demonstrated in this blog are;
- Make use of the geolocation API to get location information
- Display location on to google maps
W3C Geolocation API
The geolocation API offered by the W3C centers around a property of the DOM navigator object;
navigator.geolocation
The simplest use of the geolocation API looks like this;
Simplest use of the geolocation object in navigator
In the script shown above there is no error handling and no options. The web application should probably include at least the first two of those. When running this code for the first time the browser asks you one whether you want to reveal you location. This means that the browser will never force you to reveal you current physical location. User experience differs from browser to browser.
To recap when the getCurrentPosition(callbackfunc) is called the following takes place;
- The user is asked if he/she wants to know his/her location
- The website asking for the location
- Can change security settings
- Can choose to share or not share the location
- Can choose to tell the browser to keep the choice and never ask again
The getCurrentPosition function takes a call back function which in the example shown above is show_map. The call will return immediately but doesn’t mean that you have access to the location. The location information will be available in the call back function.
passing callback function in getCurrentPosition()
The callback function will be called with a single parameter, an object with two properties coords and timestamp. The timestamp is just that, the date and time when the location was calculated. The coords object has properties like latitude and longitude that represent exactly what they sound like which is the user’s physical location. The position object’s properties are ;
| Property | Description |
| coords.latitude | A double in decimal degrees |
| coords.longitude | A double in decimal degrees |
| coords.altitude | A double or nulle in meters |
| coords.accuracy | A double in meters |
| coords.altitudeAccuracy | A double or null in meters |
| coords.heading | A double or null in degrees clockwise |
| coords.speed | A double or null in m/s |
| timestamp | A DOM timestamp like the Date() object |
With the exception of latitude, longitude, altitude and accuracy the result from the properties might be null.
In both examples shown above no error handling is performed except when checking that the geolocation is defined. The function getCurrentPosition() takes a second argument which is an error handling callback function.
Handling errors using error callback function
In the function shown above the positionError object will contain a number if an error has occured. The number represents an error type a shown in the image above.
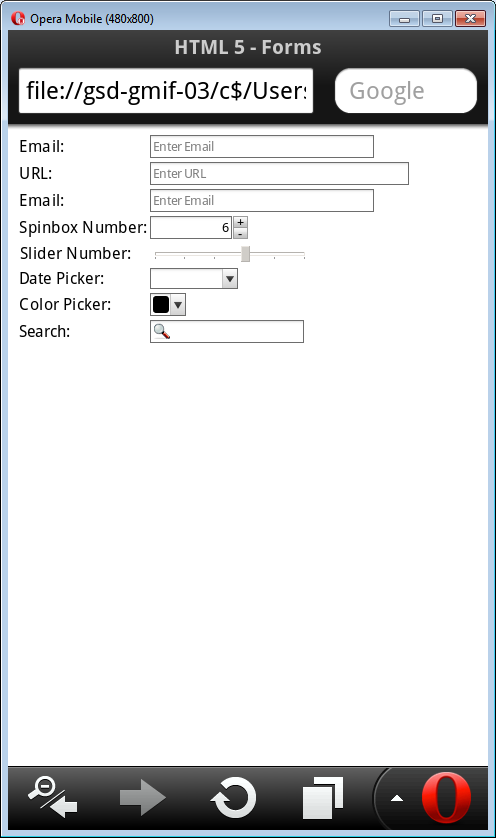
The remaining sections a demonstration of geolocation on Opera mobile emulator will take place. The version used in this demonstration is V11 and can be downloaded for free from download.
Page to demonstrate geolocation
To demonstrate the geolocation API I created an HTML document which at this point will host three functions;
- Call geolocation API
- Handle results from getCurrentPosition()
- Handle any errors from getCurrentPosition()
Geolocation function with display and error handler functions
The function above first checks that the geolocation object in the DOM navigator is defined. Then if the getCurrentPosition() function yielded any results the display_loc(position) function is called.
display_loc() function
This function takes the position object and displays the results in table cells by accessing the innerHTML property. The last function created handles any errors which could result from the getCurrentPosition() function. The code used has already been shown in a previous snippet.
The following result is achieved;
Displaying location information
An interval was created so as to refresh the location information every 60 seconds. A Stop Tracking button was also added so as to stop the timer from re-executing the script.
Google Maps
I found this part of the demonstration quite interesting. At this point in our script we have all the information we need to pin point our location on a map (latitude and longitude). These two values can be passed as parameters into google static maps to show our locations. All the information I required was available at Google Static Maps API
To add the google maps feature all I had to do was to add an anchor tag which when the page loads is empty. When the geolocation function is triggered the anchor ‘s href attribute is filled with the following URL containing my latitude and longitude positions.
URL called when clicking on link.
The display_maplink(latitude,longitude) function is called from the callback function of the getCurrentPosition() function. If an error has occured while getting the positioning information the anchor tag is set to hidden from the page.
Displaying Show Map anchor
Displaying static google map using geolocation position
Conclusion
At this point we have covered the W3C geolocation API but that is not all there is on geolocation. It is well known that there is an Open source browser plug-in from Google called Gears that provides geolocation information. The advantage of this API is that it is supported by older browsers as well as new.
This has been an informative experience from which I have learned a lot on geolocation. The drawback of such an API as I see it is different browsers. Different browsers give different experiences to the user which one might not anticipate when designing geolocation web applications for mobiles. With the slow introduction to HTML5 one can only hope that one day web technologies and markup will be standardised and make our lives a little easier.